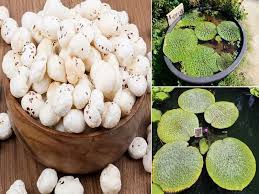
One of the oldest methods of food preservation, drying fruits remain tremendously popular today for a few very good reasons. Natural dried fruits taste wonderful, keep most of their nutrition, and you can keep them for months without refrigeration. So unlike commercial drying methods, which usually involve added sugars or preservatives, you have full control over what you’re eating when you dry fruit at home.
In this blog, we will guide you through all that you need to know about
Why Dry Fruits Naturally?
Natural drying of fruits is very beneficial.
No preservatives or chemicals
Retains nutritional value
Cost-effective
Good for storage and snacking
Sun drying (no electricity)
Although commercial dried fruits use sulfur dioxide and added sugar, dried fruit can be made at home from 100% natural and organic. shuklajee dry fruit
Best Fruits for Natural Drying
Not all fruits dry equally well. Here are some of the best fruits to dry naturally:
- Apples
- Bananas
- Mangoes
- Papayas
- Grapes (raisins)
- Figs
- Plums (prunes)
- Pears
- Berries (strawberries, blueberries)
Citrus fruits are generally not recommended for natural drying due to their high water and acid content.
Methods to Dry Fruit Naturally
There are a few common natural drying methods. Let’s look at the most effective ones:
1. Sun Drying
Sun drying is the most traditional method and works best in hot, dry climates.
Steps:
- Wash and slice the fruit into uniform thin slices (about ¼ inch thick).
- Soak in lemon water (optional) to prevent browning.
- Arrange the slices on a clean tray or wire rack with enough space for air to circulate.
- Cover with a thin mesh cloth or net to protect from insects and dust.
- Place under direct sunlight, ideally between 10 AM to 4 PM.
- Turn the slices once or twice a day for even drying.
- Drying time: 2–6 days depending on the fruit and weather.
Tips:
- Choose a dry, hot spot with plenty of airflow.
- Bring the trays inside at night to prevent moisture from dew.
2. Shade Drying
This method works better for delicate fruits that may lose color or nutrients under direct sun.
Steps:
- Follow the same preparation as sun drying.
- Place the trays in a warm, well-ventilated shaded area.
- Ensure good airflow and protection from pests.
- Drying time may take longer—up to 10 days.
3. Indoor Air Drying
Useful in humid or urban areas without access to strong sunlight.
Steps:
- Slice fruit thinly and place on mesh racks or tie on a thread (like a garland).
- Hang or place in a warm, dry room with good ventilation.
- A fan can help speed up drying.
- Drying time: 5–10 days.
How to Know When Fruit is Dried?
Properly dried fruit should be:
- Pliable but not sticky
- Leather-like texture
- No visible moisture inside when cut
- Doesn’t release juice when pressed
Over-drying can make fruit too hard, while under-drying can lead to spoilage. Always test a few pieces before storage.
Storage Tips for Dried Fruit
Once dried, fruits should be stored properly to maintain freshness.
- Cool completely before storage to prevent condensation.
- Use glass jars, airtight containers, or vacuum-sealed bags.
- Store in a cool, dry, and dark place.
- Label with date of drying for easy tracking.
Shelf life: 6 to 12 months depending on storage conditions.
Bonus: Rehydrating Dried Fruit
If you want to use dried fruits in cooking or baking, you can rehydrate them by soaking them in water, juice, or even a flavored liquor for 1–2 hours. This brings back their plumpness and soft texture.
Natural Fruit Drying – Quick Do’s & Don’ts
Do’s:
- Use fresh, ripe (but not overripe) fruit.
- Cut evenly for uniform drying.
- Protect from dust and insects.
- Rotate or flip regularly.
- Store in airtight containers.
Don’ts:
- Don’t use bruised or spoiled fruit.
- Don’t stack slices too closely.
- Don’t store while still warm or moist.
- Don’t skip labeling or dating.
Conclusion
Learn how to dry fruit naturally, whether you need to prepare it for long-term storage, want healthy snacks on the go, or simply want to reduce food waste — something we enter every household should try.Have you tried drying fruits at home?
Share your experience in the comments below or tag us with your dried fruit creations on Instagram at @ShuklajeeDryFruit!